How to set up Postback tracking in AdsBridge
Step 1: Step one in setting up postback tracking is getting the S2S postback url from your AdsBridge campaign and copy it to your clipboard.

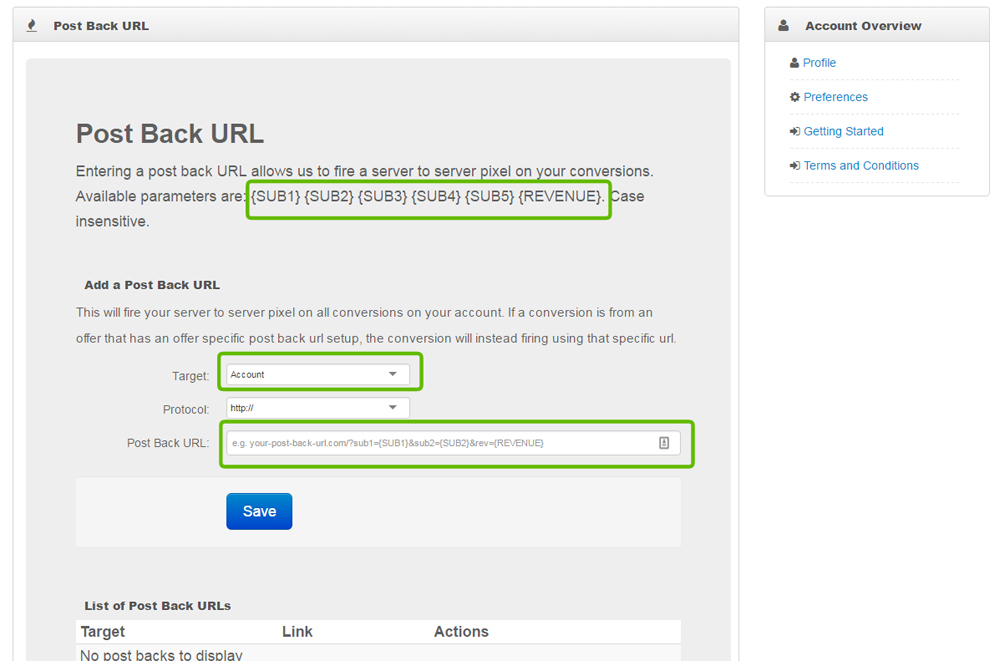
Step 2: Step two is to place the postback url into your YTZ
account. Target should be set as Account to make the postback
active on all offers. Replace “YOUR NETWORK TOKEN” with YTZ’s macro
{SUB1} (Alternatively {SUB2} {SUB3} {SUB4} {SUB5} can be used as well).
After this, we recommend appending &amt={REVENUE} to automatically pass
your payout back into AdsBridge.
Example:
http://abpostback.com/trackpixel/track?tid={SUB1}&amt={REVENUE}
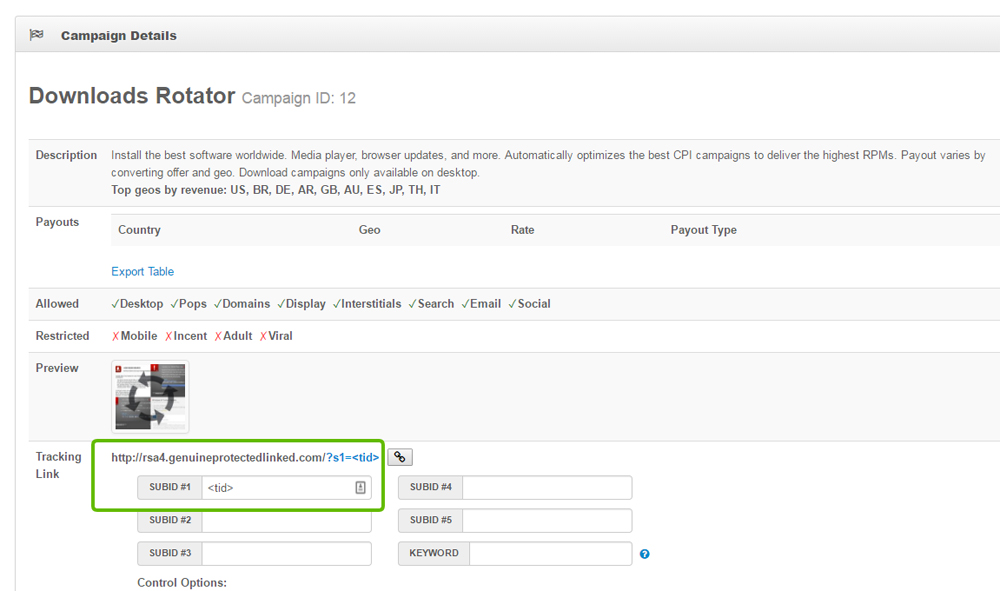
Step 3: When pulling links from YTZ
Campaigns be sure to use the AdsBridge clickid macro <tid> in
the matching subid field.
Example: If your postback is set up like this:
http://abpostback.com/trackpixel/track?tid={SUB1}&amt={REVENUE}
Then your YTZ campaign link should look like this:
xxx.genuineprotectedlinked.com/?s1=<tid>
Have questions on how to set up YTZ as a AdsBridge campaign please see the AdsBridge tutorial here.
If you have any suggestions or improvements for this guide please send me an email at max@ytz.com